Setting up an Event
Create the event
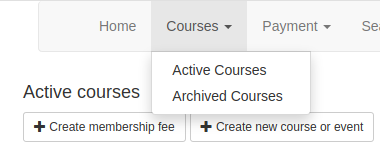
Go to Courses/Active Courses and click on Create new course or event
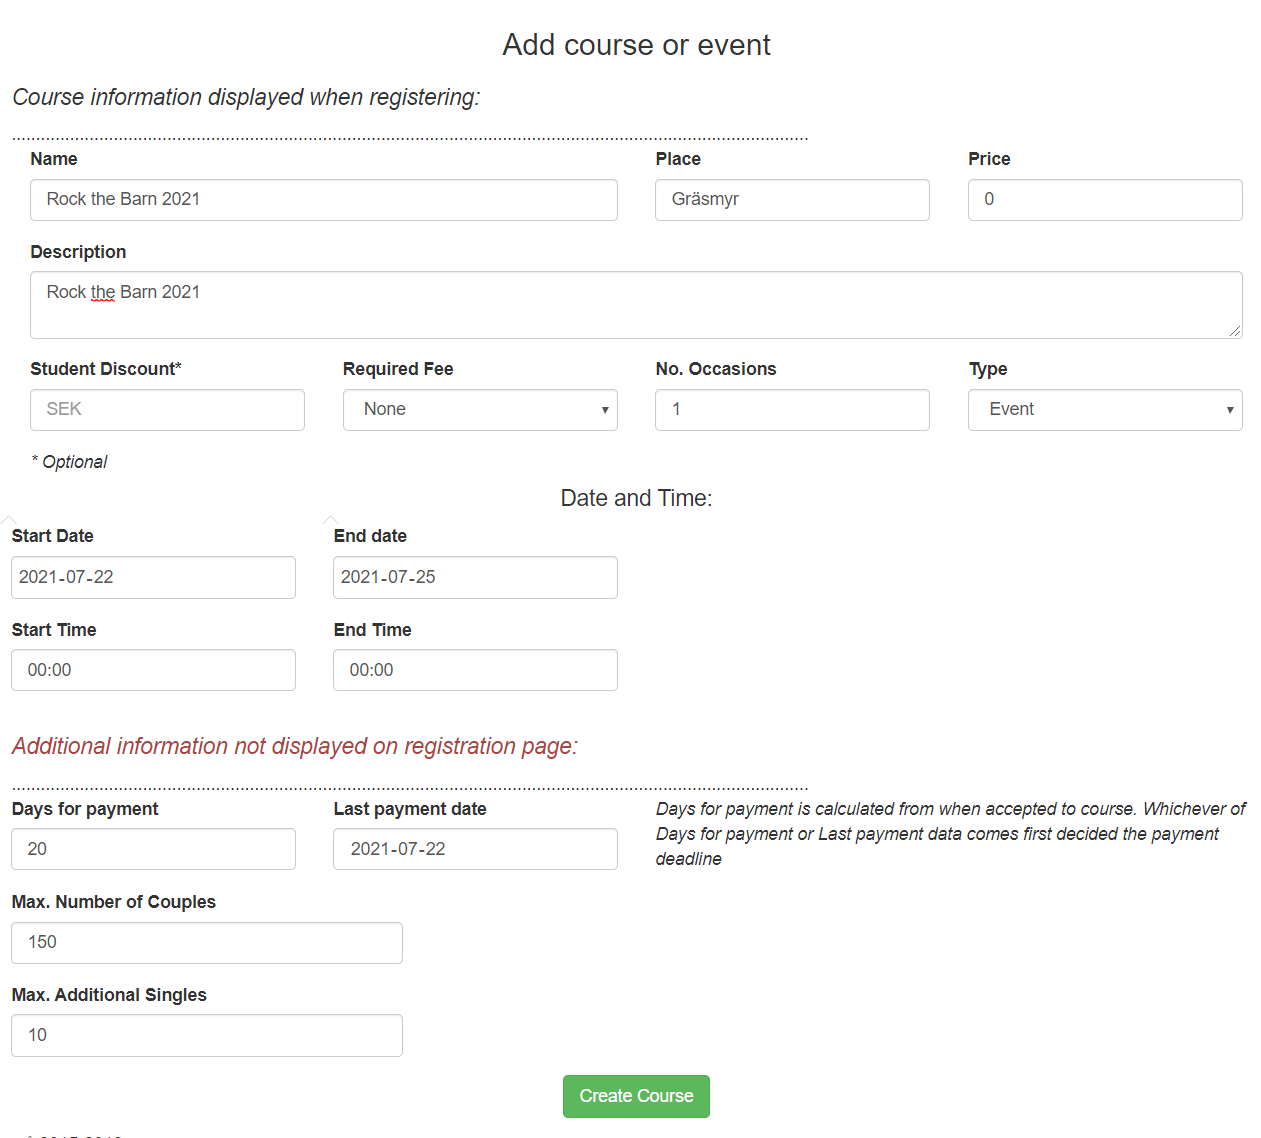
Creating an event is a bit different from creating a normal course. If you intend to have different Pass options you need to set the price of the course to 0, and then put the different prices on the passes instead. If you don’t have different passes just set the price as usual. Notice also that the Type has changed to Event.
Once you have created the event you can start adding options. Click on the Manage course button. At the bottom there is some predefined options to choose from:

Add Passes
Click on the Add passes button as displayed above.
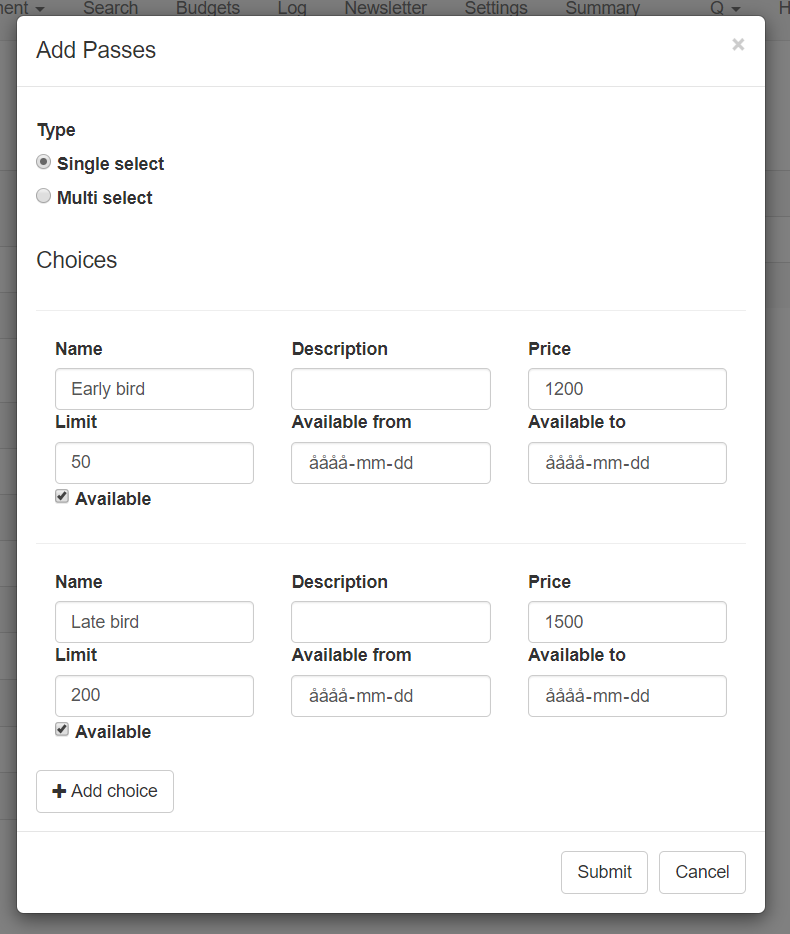
When you click on the Add Pass button you have the option to Add choices. Here you can add all the different passes you want. The only required thing is the name, the rest of the fields are optional. You can set the available date to match for example Early bird and Late bird dates, or you can set limits to how many passes that are availabe, once a limit is reached it won’t be displayed for registration anymore. Also remember to choose if the option is single select or multiselect. If it is single select, the user can only choose one of the options, as we would want for our passes.
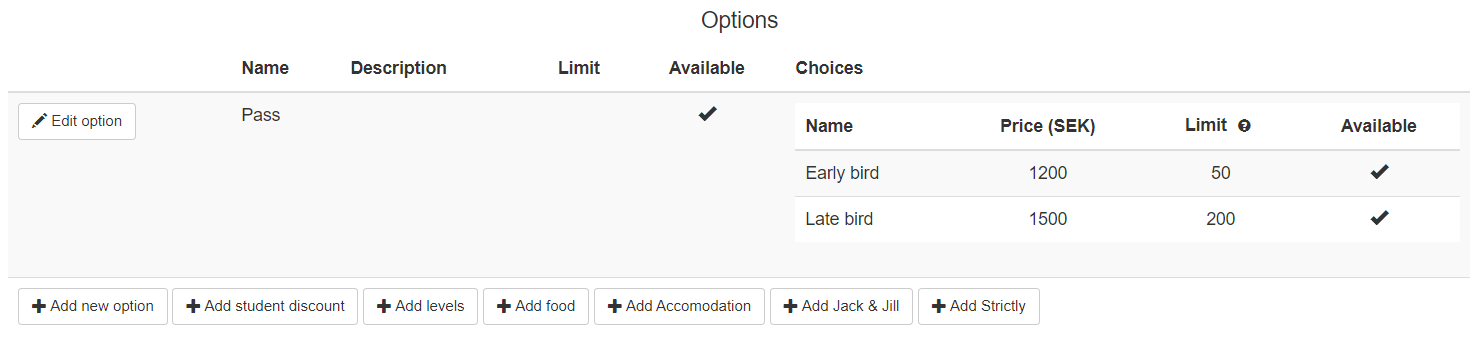
When you have created the Passes, they will be displayed in the Options menu. If you want to edit them, click the Edit option button. The available column displays if an option is available to the user or not, and this can also be edited.
Add Levels
Depending on whether the event has levels or not, you can click the Add levels button to add levels. This is not required, and only used for events that require that users register for a certain level.
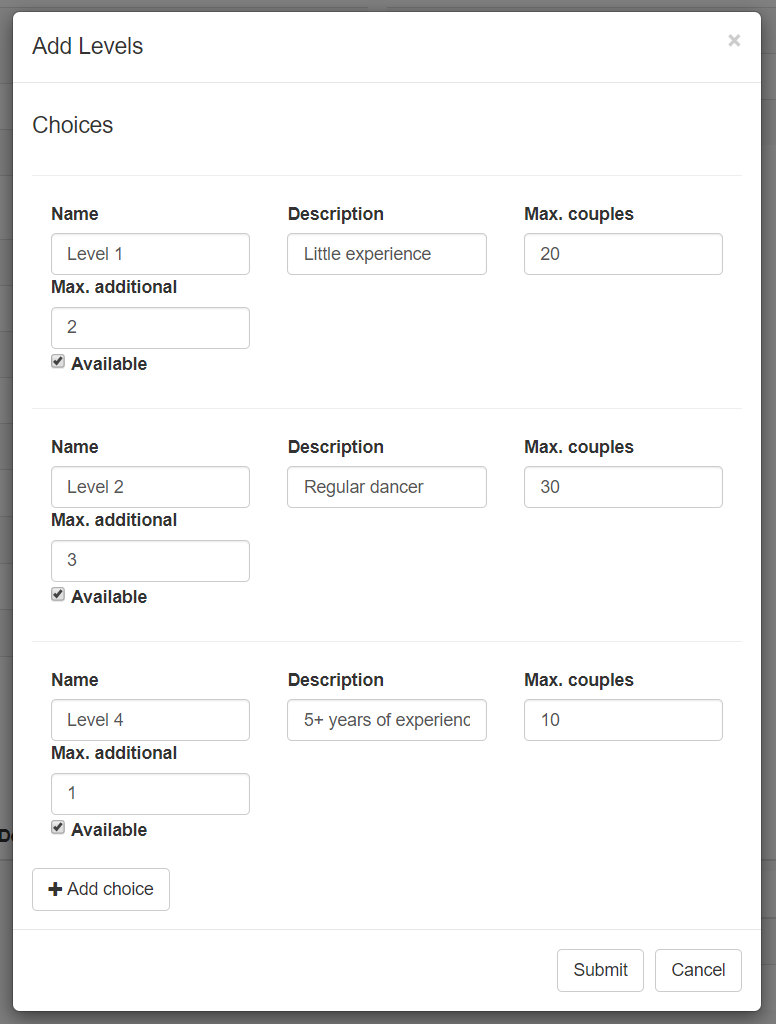
If you don’t want to put any real restrictions on how many couples that could be accepted to each level, but only care about the balance, put a high number in the Max. Couples box, and the maximum additional to what you want. Then it will only make sure that the total Maxmim couples for the overall event is not exceeded.
This is the only option that has a queue, and only accepts people based on the level they register for. So if a maximum number of additional is reached, the level will still be displayed, but the user will be put in queue. Note that it is not possible to close the registration for for example single followers on a level. In addition, if a couple does a partner registration, they would have to register to the same level for the system to accept them.
All levels can also be edited later if needed.
Add Food packages
If you want to add food packages to the event, click on the Add Food button.
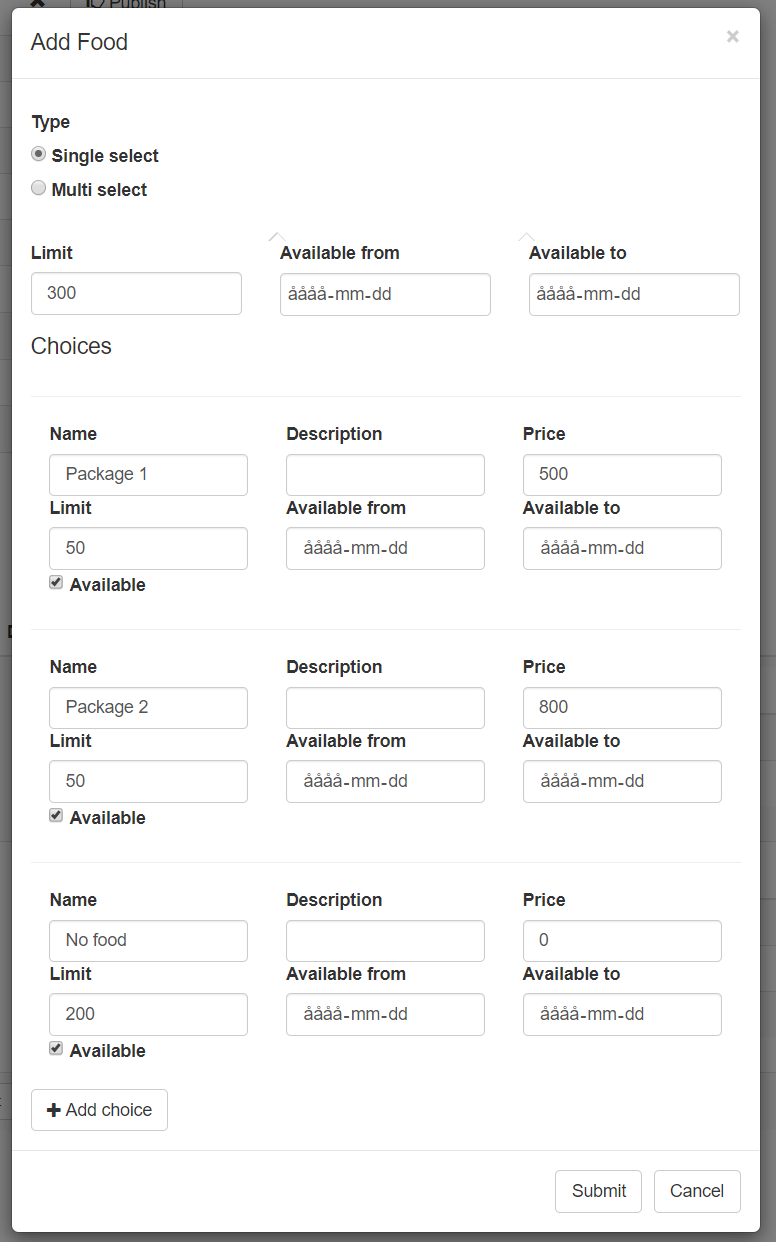
If the users only are allowed to choose one food package, click the single select button, otherwise take the multi select. If you set the first limit, it will be the overall limit for all the different choices. In this example it means that the users can register for all food packages until the total count reaches 300, then all the choices becomes unavailable. Once a single food option reached its limit, it will also become unavailable.
Watch out! If you choose the single select option, make sure to add an option with No foodpackage, since the user has to choose something.
Add Accomodation
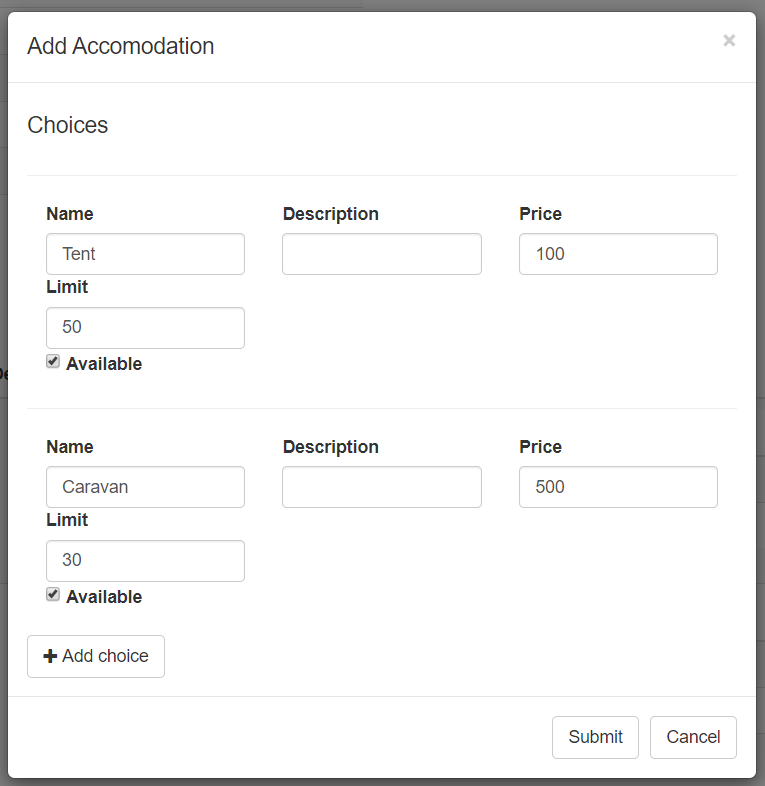
Next thing you can add is accomodation options, by clicking the Add accomodation button. Fill in which different accomodation options there are. You can set a limit for each specific choice, for example how many can choose the caravans.
Add competitions

It is also possible to add competitions so people can register in advance. The competition registrations can then be exported to json format for import into compatible scoring systems. Add which divisions you want to offer. Adding Strictly looks the same as adding Jack&Jills. If you want to merge or change prices for certain divisions, you can do that after creating them, via the Edit button.
After adding all options, the Options menu should look something like this:
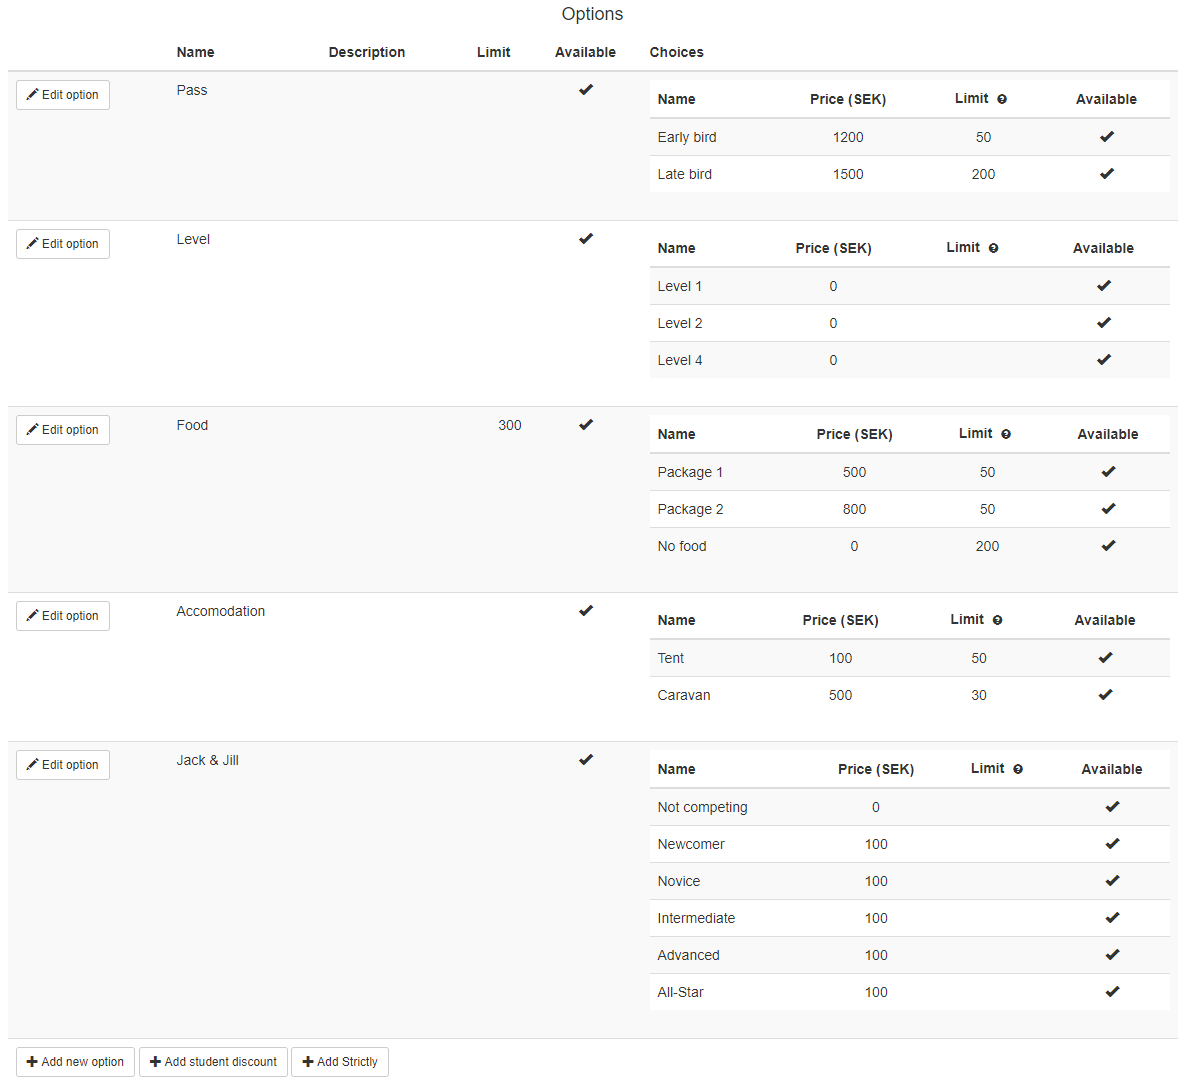
From here you can do some final editing, or go ahead and publish the course.
Publish course
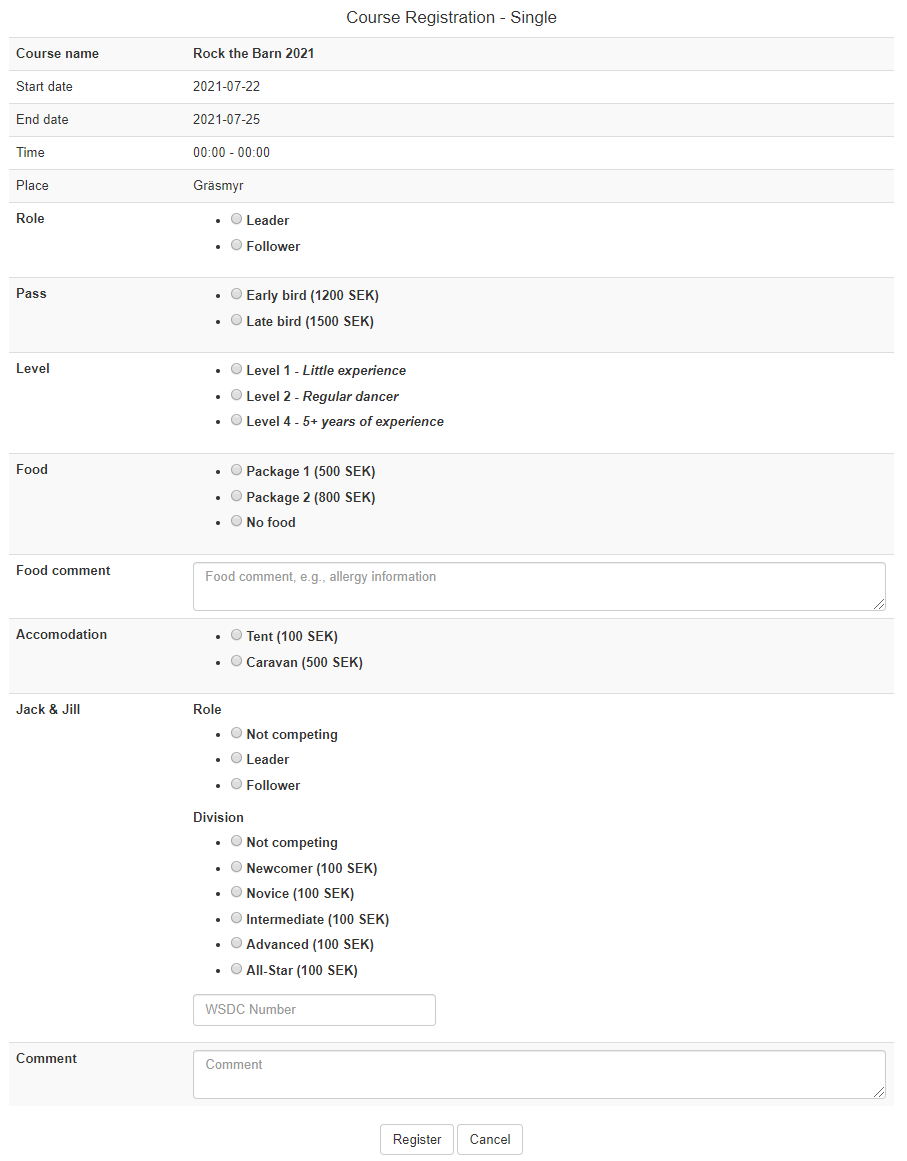
Publish the course using the Publish button on the Manage couse page. When presented for users the course will look like this: